
Introduction :
Starting an online store may sound complicated, especially if you’ve never created a website before. But with WordPress and the right tools, you can build a professional store without knowing how to code.
In this guide, I’ll show you How to Create an Online Store with WordPress from the beginning. We’ll go through everything step by step, from choosing hosting to adding your first product.
If you’re wondering How to Create an Online Store with WordPress on a budget, you don’t need to hire a developer or spend a huge amount of money. You can start with a simple WordPress setup and add the features you need as your store grows.
For hosting, I personally recommend Hostinger for beginners. The setup is simple, and it provides the basic features you need to get a WordPress store online.
👉 Start Your Online Store with Hostinger
Before you begin, you will need a domain name and WordPress hosting. If you are completely new to WordPress, stay tuned.
The good thing about learning How to Create an Online Store with WordPress is that you can build different types of stores. You can sell physical products, digital products, services, handmade items, or even products from your own small business.
You don’t have to build everything at once. Start with the important parts, add your products, set up payments, and improve your store gradually.
If you’re ready to learn How to Create an Online Store with WordPress, let’s start with the things you’ll need before building your store.
What We’ll Cover
In this guide, you’ll learn:
How to choose hosting for your store
How to install WordPress
How to install WooCommerce
How to add products
How to set up payments
How to configure shipping
How to customize your store
How to secure your website
How much an online store can cost
Common mistakes to avoid
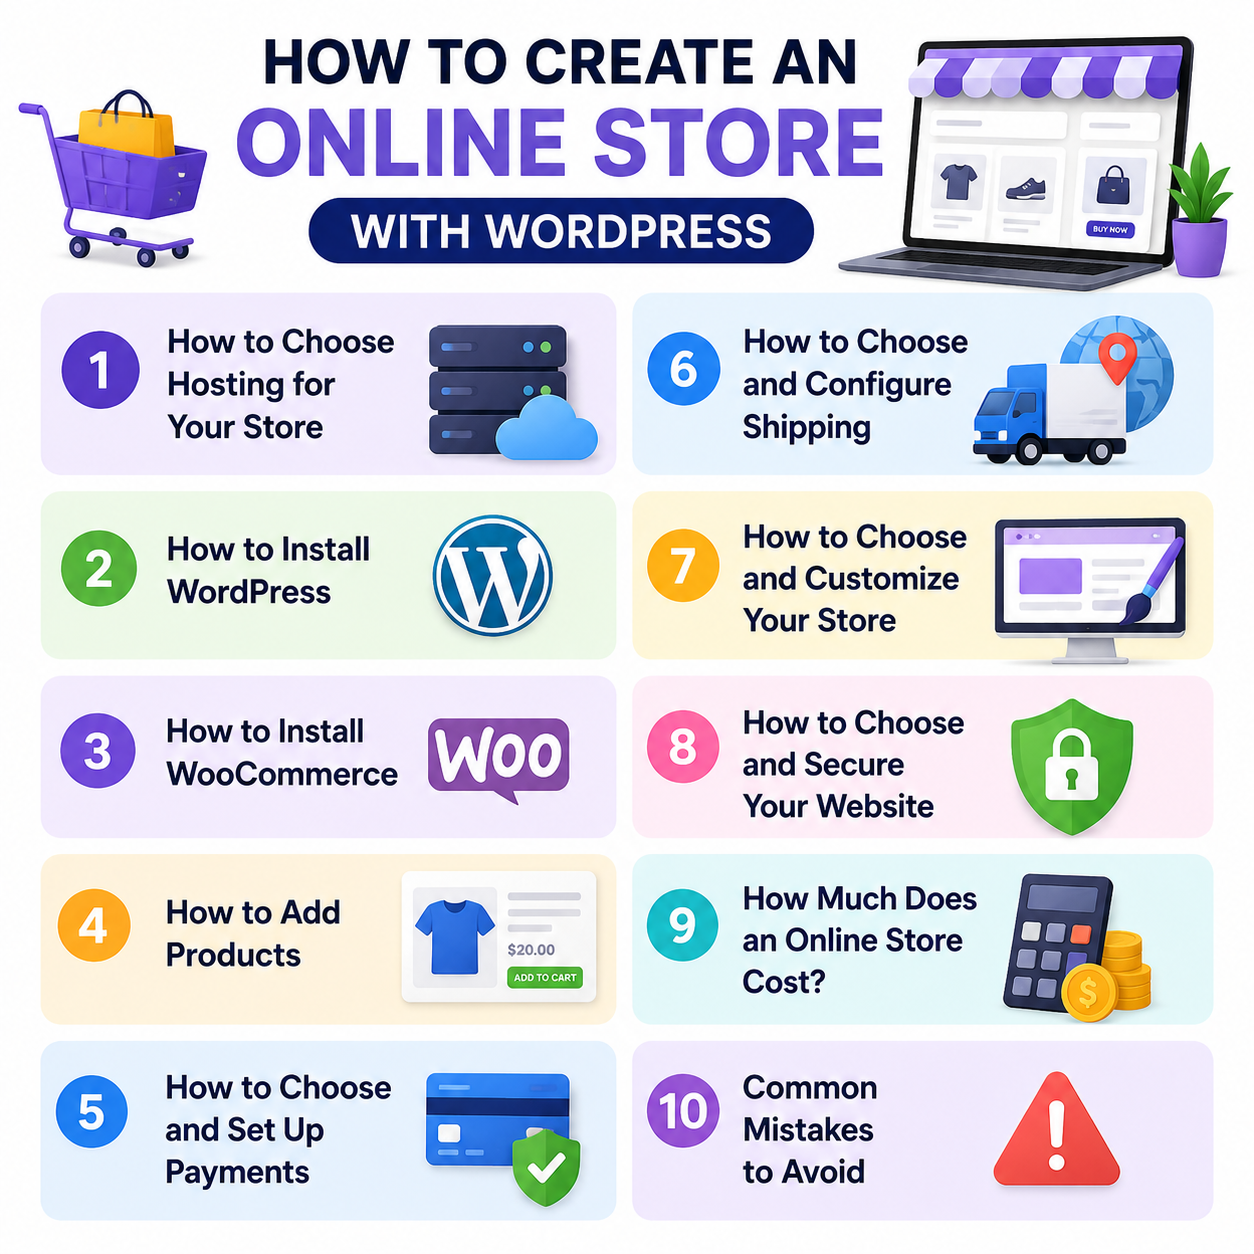
By the end, you’ll have a clear idea of How to Create an Online Store with WordPress and what you need to get your first store online.
📌 Helpful Guide: If you want to understand WordPress installation before continuing, check out my How to Install WordPress Step by Step guide.
1.What Is an Online Store?
An online store is a website where you can sell products or services directly to customers. Instead of visiting a physical shop, customers can browse your products, add items to their cart, make a payment, and place an order online.
If you’re learning How to Create an Online Store with WordPress, the good news is that you don’t need advanced technical knowledge. WordPress makes it possible to create a complete online store using plugins and ready-made themes.
For example, you can sell:
- 👕 Clothing and fashion products
- 📱 Electronics
- 👜 Handmade products
- 📚 Digital products
- 💻 Online services
- 🏠 Home and lifestyle products
The best part is that you can start small and add more products and features as your business grows.
When learning How to Create an Online Store with WordPress, you’ll usually use WooCommerce to turn your normal WordPress website into an eCommerce store.
WooCommerce handles important things like products, shopping carts, checkout, orders, and payments. This means you don’t have to build these features yourself.
You’ll also need reliable hosting before you start. I recommend Hostinger for beginners because it’s easy to set up and works well with WordPress.
👉 Get Hostinger for Your Online Store
Once your hosting and WordPress are ready, the next major step in How to Create an Online Store with WordPress is installing WooCommerce.
In the next section, we’ll look at exactly what you need before starting your store so you don’t miss any important step.
2. What do you need to create an online store with WordPress?
Before you start building an online store with WordPress, it is best to have a few essentials ready. This makes the setup process much easier and helps avoid potential issues later on.
1. Domain Name
Your domain is the web address customers will use to visit your store—for example, yourstore.com.
Try to choose a short, simple name that is easy to remember and relevant to your business.
If you want to save money on your domain, you can read my guide on “How to get a free domain for 1 year with Hostinger” to understand how the offer works.
2. WordPress Hosting
You will need reliable hosting to store your website’s files and keep your store online.
For beginners, I recommend Hostinger because it offers an easy WordPress setup, and its hosting plans include the features necessary to launch an online store.
👉 Get Hostinger for your online store
Starting an online store with WordPress is quite simple with Hostinger, which is why I recommend it for beginners who want an easy and affordable way to get their store online.
If you choose Hostinger for your hosting, it can be a great option, especially if you’re just starting out. Depending on the plan, you can get features like a free domain, free SSL, and an easy-to-use hosting dashboard.
3. WordPress
WordPress will be the platform you’ll use to build and manage your website. You don’t need coding knowledge to create a basic store with WordPress.
4. WooCommerce
WooCommerce is the plugin that adds eCommerce functionality to WordPress. It lets you create products, manage orders, set prices, configure payments, and handle other important store functions.
5. Your Products
Before starting How to Create an Online Store with WordPress, decide what you want to sell.
You can sell physical products, digital downloads, subscriptions, or certain services depending on how you configure your store.
6. Payment Method
You’ll also need a way to accept payments from customers. The available payment options depend on your country and the payment gateway you choose.
7. Basic Store Information
Keep your business details ready, including:
- Store name
- Business email
- Contact information
- Product images
- Product descriptions
Prices - Shipping information
- Return and refund policy
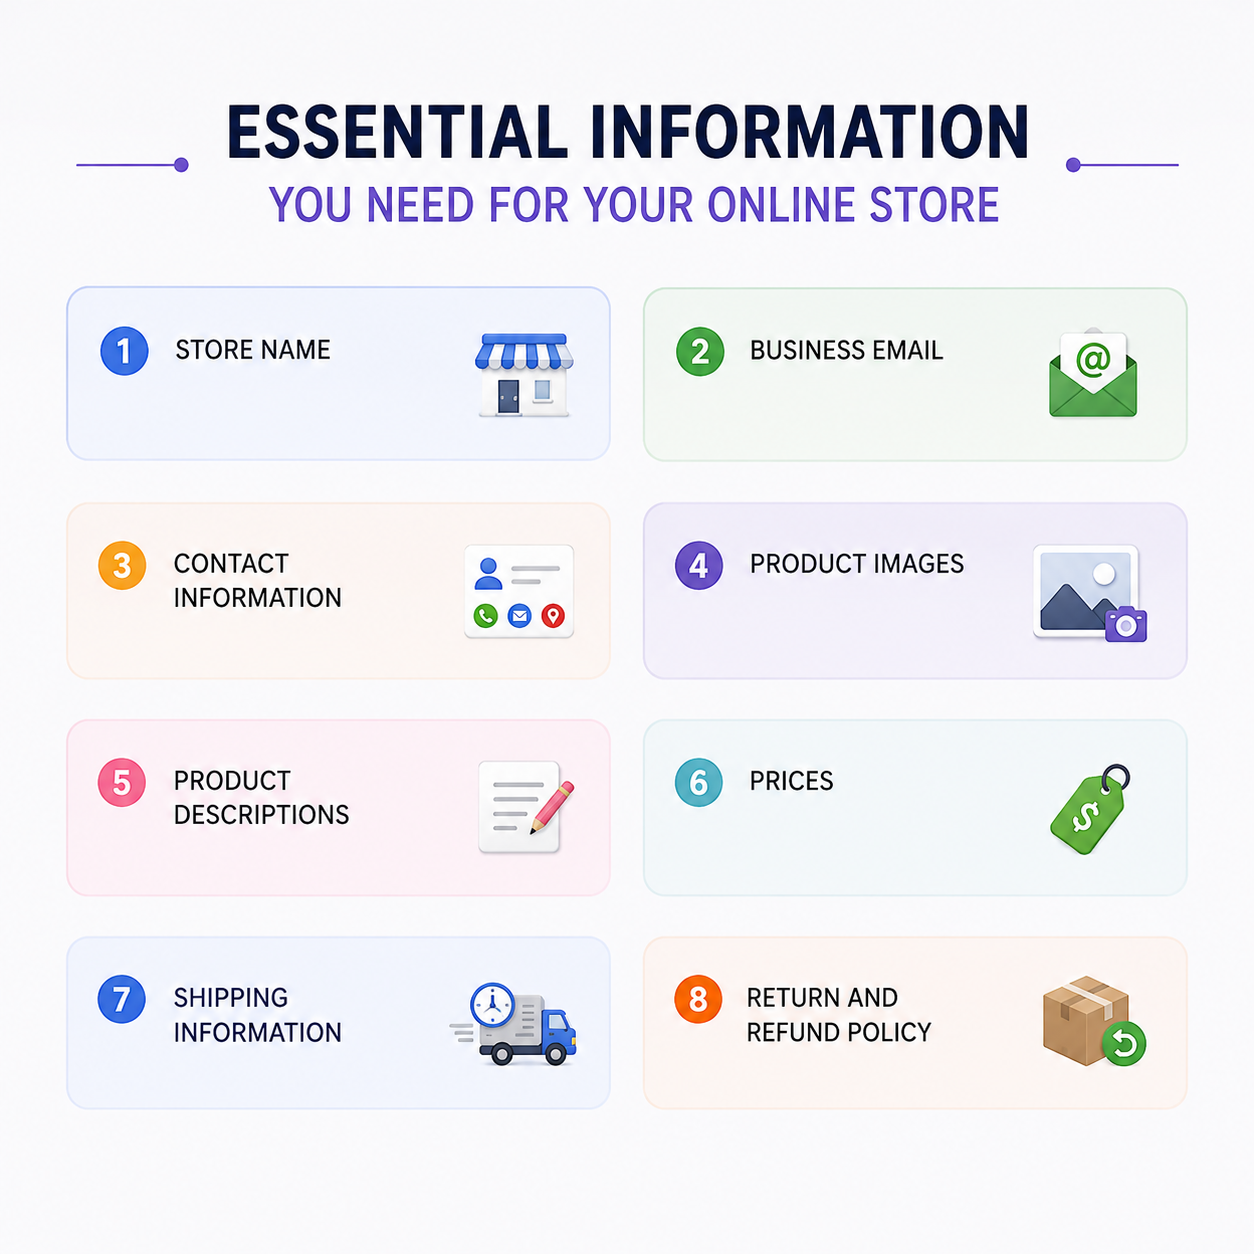
Once these things are ready, the actual process of How to Create an Online Store with WordPress becomes much easier.
3.Why I Recommend Hostinger for a WordPress Store
When you’re learning How to Create an Online Store with WordPress, choosing the right hosting is an important first step. Your hosting affects your website’s speed, security, and overall performance.
I personally recommend Hostinger for beginners because the setup is simple and the hosting is designed to work well with WordPress.
Hostinger also provides features such as SSL, WordPress installation tools, backups on eligible plans, and performance features that can be useful for an online store.
Another reason I like Hostinger is its beginner-friendly control panel. You can manage your hosting, domain, email, and website settings from one place.
If you’re planning How to Create an Online Store with WordPress for the first time, you don’t want to spend hours dealing with complicated hosting settings. A simple setup can make the whole process much easier.
What I Like About Hostinger
- Easy WordPress setup
- Free SSL on hosting plans
- Beginner-friendly control panel
- Performance-focused hosting
- 24/7 customer support
- Free domain on eligible plans
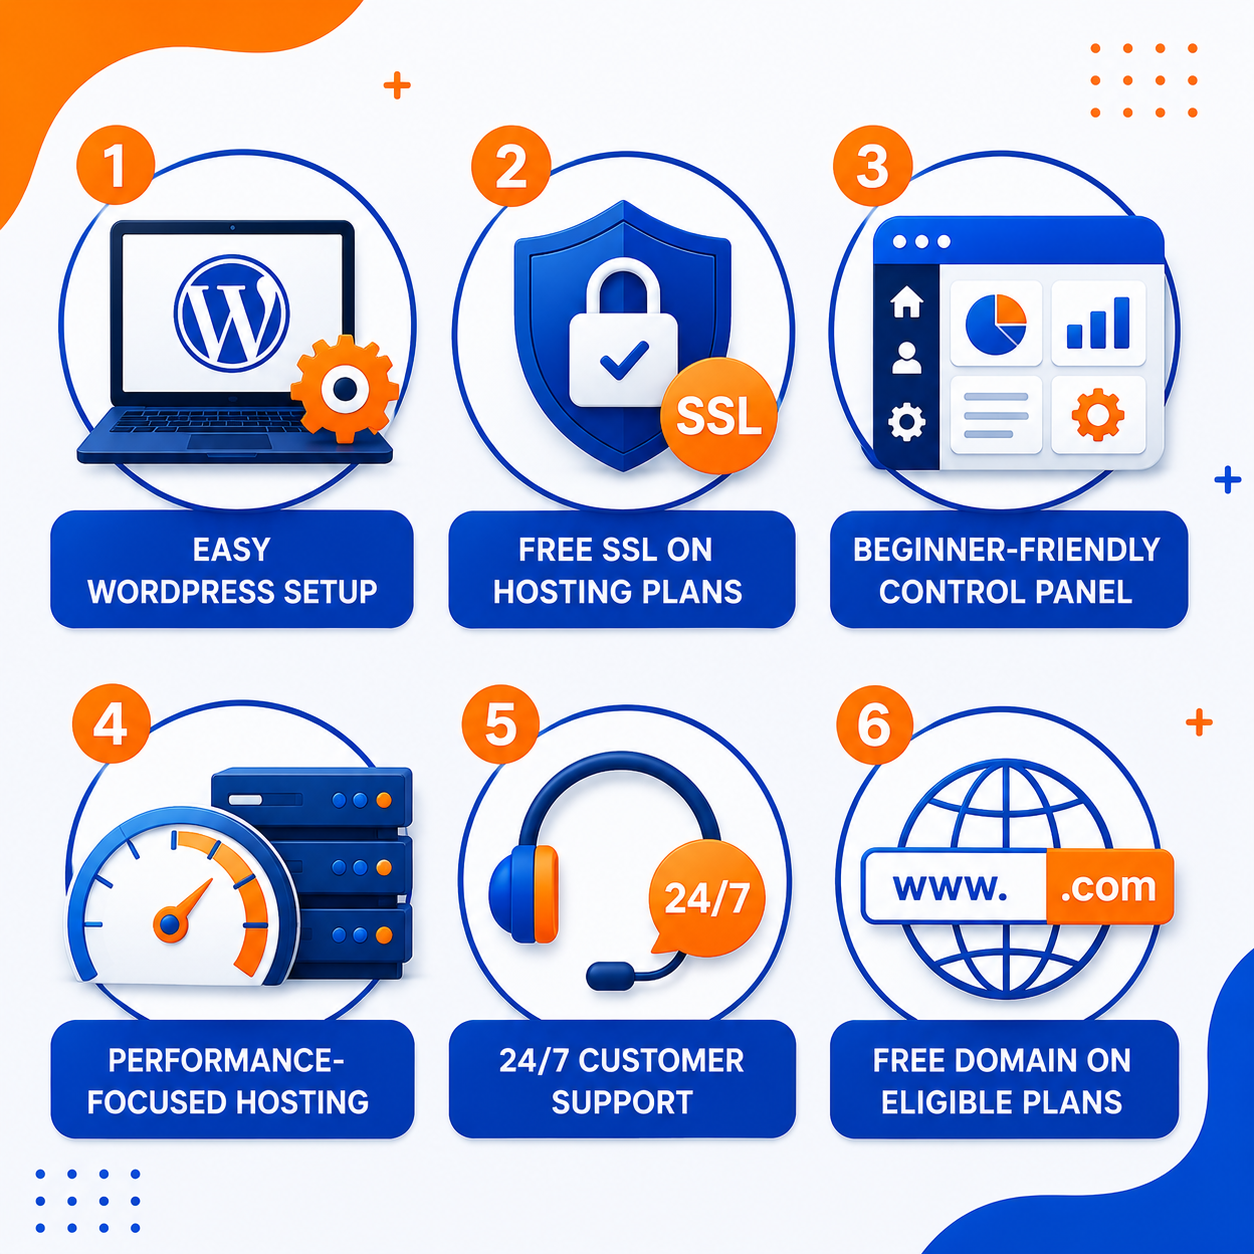
Before purchasing, make sure you check the current plan features and renewal pricing because offers can change.
🚀 Start Your WordPress Store
If Hostinger fits your budget and store requirements, you can check its current plans here:
👉 Get Hostinger for Your Online Store
Once your hosting is ready, the next step in How to Create an Online Store with WordPress is installing WordPress.
For that step, you can also use my detailed guide How to Install WordPress Step by Step.
After WordPress is installed, we’ll move on to the most important eCommerce tool: WooCommerce.
4.How to Buy Hosting for Your Online Store
If you’re ready to learn How to Create an Online Store with WordPress, the first practical step is getting your domain and hosting.
I recommend starting with Hostinger if you’re a beginner because the setup is simple and you can manage your WordPress website from an easy-to-use dashboard.
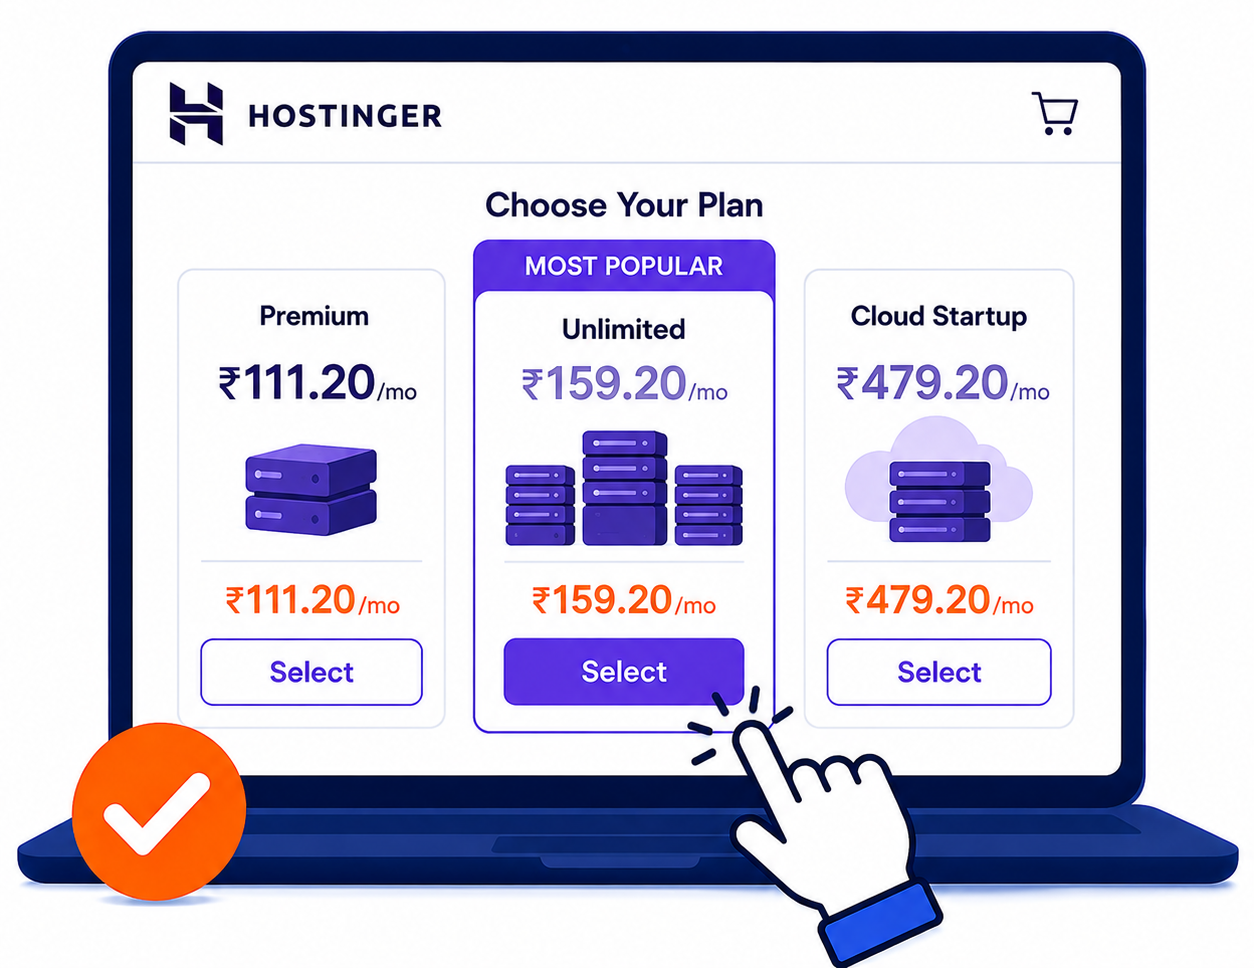
Step 1: Choose a Hostinger Plan
Visit Hostinger and choose a WordPress hosting plan that matches the size of your store.
For a new or small store, you usually don’t need the most expensive plan. Start with the resources you actually need and upgrade later if your store grows.
Step 2: Complete Your Purchase
Enter your account and payment details, select the hosting period, and complete the purchase.
Before paying, check the plan price, renewal price, included features, and any promotional offers.
Step 3: Choose Your Domain
Next, choose a domain name for your store.
Keep it short, easy to spell, and related to your brand. If your selected Hostinger plan includes a free domain, you can use that offer to reduce your initial cost. button shown nearby.
Step 4: Open Your Hosting Dashboard
After completing the purchase, log in to your Hostinger account. From the dashboard, you’ll be able to manage your domain and hosting settings.
Now you’re ready for the next part of How to Create an Online Store with WordPress—installing WordPress.
Once WordPress is installed, we’ll install WooCommerce and start turning your website into a proper online store.
5. How to Install WordPress on Hostinger
Now that your hosting is ready, the next step in creating an online store with WordPress is to install WordPress itself.
You don’t need coding knowledge for this. Hostinger offers a simple setup process that makes it easy for beginners to install WordPress.
Step 1: Log in to Hostinger
If you are from India, you can visit Hostinger’s Indian website, Hostinger.in, to log in and manage your hosting account. If you are from another country, you can use Hostinger.com.
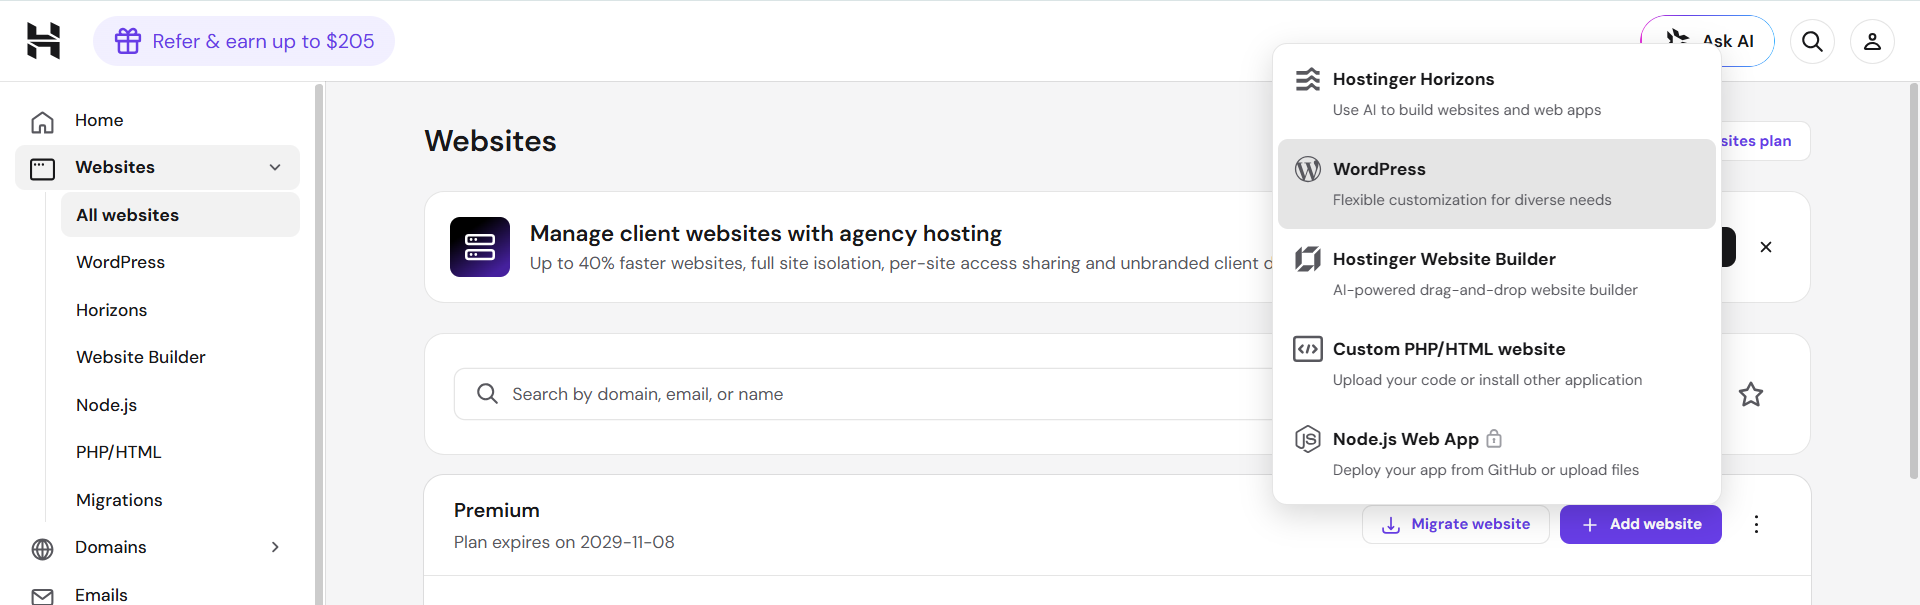
After logging in, open your Hostinger hosting dashboard and look for the option to set up or manage your WordPress website. From there, you can proceed with the WordPress installation and store setup process.
Step 2: Select WordPress
Choose WordPress as the platform you want to install.
You will usually be asked to create your WordPress administrator account. Use a strong username and password that you can keep secure.
Step 3: Choose Your Domain
Select the domain where you want to install WordPress.
Make sure you choose the correct domain, as it will become the main address for your online store.
Step 4: Complete the Installation
Follow the setup instructions and let Hostinger complete the WordPress installation.
Once this is done, you can access your WordPress dashboard and start building your store.
If you want more details, the WordPress installation process is explained separately in my guide: ‘How to Install WordPress: A Step-by-Step Guide‘.
🔗 Your Hostinger Hosting
If you haven’t purchased hosting yet, you can view Hostinger’s current plans here:
👉 Get Hostinger for your online store
Once WordPress is installed, you are ready for the most important step in creating an online store with WordPress—installing WooCommerce. WooCommerce will add a shopping cart, product management, checkout, orders, and other essential e-commerce features to your WordPress website.
6.How to Install WooCommerce
Once WordPress is installed, the next step in How to Create an Online Store with WordPress is adding WooCommerce. It turns your regular WordPress website into an online store.
The good thing is that WooCommerce is easy to install, even if you’re a beginner.
Step 1: Open WordPress Dashboard
To open your WordPress dashboard, type yourwebsite.com/wp-admin in your browser’s address bar and press Enter. You’ll then see the WordPress login page. Enter your username and password to access your dashboard.
From the left-hand menu, go to:
Plugins → Add New Plugin
Search for WooCommerce.
Step 2: Install WooCommerce
Find the official WooCommerce plugin and click Install Now.
After the installation finishes, click Activate.
Step 3: Complete the Setup
WooCommerce will guide you through some basic store settings.
You’ll usually need to enter information such as:
Store location
Currency
Product type
Shipping
Payment options
Take your time here and select the options that match your business.
Step 4: Add Your Store Details
After completing the initial setup, you’ll be taken to your WooCommerce dashboard.
From here, you can manage products, orders, payments, customers, and other store settings.
If you’re following How to Create an Online Store with WordPress, this is the point where your website starts becoming a real eCommerce store.
You don’t need to install dozens of plugins at this stage. Start with the basic WooCommerce features and add extra tools only when you actually need them.
🚀 Quick Tip
Before adding products, make sure your website has SSL enabled and your store information is correct.
Once WooCommerce is ready, the next step is adding your first product and setting its price, image, description, and other details.
7.How to Set Up Your Online Store
WooCommerce install karne aur products add karne ke baad, How to Create an Online Store with WordPress ka next important step hai apne store ki basic settings complete karna.
A well-set-up store makes it easier for customers to browse products, place orders, and understand your business.
1. Add Your Store Information
Start by adding your basic business information.
This can include:
Store name
Business email
Contact information
Store address
Currency
Make sure these details are correct because some of them may appear on invoices, emails, and checkout pages.
2. Create Product Categories
If you sell multiple types of products, create categories to keep everything organized.
For example, a clothing store might have:
Men’s Clothing
Women’s Clothing
Shoes
Accessories
Electronics
Beauty & Personal Care
Home & Kitchen
Sports & Fitness
Kids & Baby Products
Books & Stationery
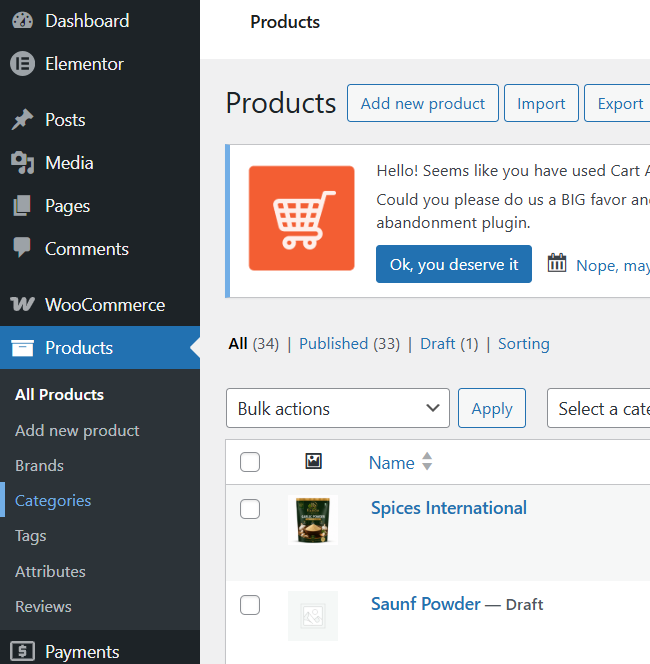
Categories make it easier for customers to find what they’re looking for.
3. Set Up Your Shop Page
WooCommerce normally creates the main shop page for your products.
Check the page on your website and make sure your products are displayed correctly.
You can later customize the layout, product columns, filters, and other elements according to your store design.
4. Configure Your Cart and Checkout
Your cart and checkout pages should be simple and easy to understand.
Check that customers can:
Add products to the cart
Change quantities
Remove products
Enter their details
Choose a payment method
Place an order
A simple checkout can make the process much smoother for customers.
5. Add Important Store Pages
Before launching your store, create the necessary pages. Go to Pages in your WordPress dashboard and click Add New to create a new page.
such as:
Home
About Us
Contact Us
Cart
Privacy Policy
Terms & Conditions
Shipping Policy
Return & Refund Policy
These pages help customers understand your business and can also make your website look more trustworthy.
6. Check Your Store on Mobile
Don’t forget to open your store on a smartphone.
Many customers shop using mobile devices, so your product pages, menus, cart, and checkout should work properly on smaller screens.
When you’re learning How to Create an Online Store with WordPress, these small details are easy to overlook, but they can make a big difference to the customer experience.
Once your basic store setup is complete, you can move on to adding and organizing your products properly.
8. How to Add Products to Your WordPress Store
Now that WooCommerce is installed, the next step in How to Create an Online Store with WordPress is adding your products.
Adding products is quite simple. You just need to provide the right information so customers can clearly understand what you’re selling.
Step 1: Go to Products
From your WordPress dashboard, go to:
Products → Add New Product
You’ll see a page where you can enter all the details about your product.
Step 2: Add Product Name
Start with a clear product name.
For example:
Men’s Cotton Casual Shirt
Women’s Floral Summer Dress
Wireless Bluetooth Earbuds
Avoid complicated names. Your customers should understand the product at first glance.
Step 3: Write a Product Description
Add a simple and useful description.
Mention important details such as:
- Product features
- Material
- Size
- Color
- Benefits
- What’s included
Don’t copy descriptions from other websites. Write your own descriptions whenever possible.
Step 4: Add Product Images
Good product images are extremely important for an online store.
Use clear, high-quality images and show the product from different angles.
You can also add a featured image that will appear on your main shop and product pages.
Step 5: Set the Price
Enter your regular selling price.
If you’re offering a discount, WooCommerce also lets you add a sale price.
Make sure your pricing is clear so customers don’t feel confused during checkout.
Step 6: Choose the Product Type
WooCommerce supports different types of products, including:
- Simple products
- Variable products
- Virtual products
- Downloadable products
- Grouped products
Choose the option that matches what you’re selling.
Step 7: Publish Your Product
Once everything looks correct, click Publish.
Your product will now be available on your online store.
When you’re learning How to Create an Online Store with WordPress, don’t feel like you need to add dozens of products on the first day. Start with a few well-prepared products and improve your store gradually.
9.How to Set Up Payment Methods
Once your products are ready, the next important step in How to Create an Online Store with WordPress is setting up payment methods.
Your customers need a simple and secure way to pay for their orders. The payment options you choose will depend on your country, business type, and the payment gateway you want to use.
Step 1: Open WooCommerce Payments Settings
From your WordPress dashboard, go to:
WooCommerce → Settings → Payments
Here you’ll see the payment methods available through WooCommerce and the payment plugins you’ve installed.
Step 2: Choose the Payment Methods
You can offer different payment options depending on your store.
For example:
- Credit and debit cards
- UPI
- Net banking
- Digital wallets
- Cash on Delivery
- Other supported payment gateways
For an Indian store, offering familiar options such as UPI can make checkout easier for customers.
Step 3: Install a Payment Gateway
WooCommerce itself doesn’t process every payment method automatically. You may need to install and connect a suitable payment gateway plugin.
Choose a trusted provider that supports your country and business requirements.
Before activating any payment gateway, check its transaction fees, supported payment methods, settlement process, and verification requirements.
Step 4: Test Your Checkout
Don’t skip this step.
After setting up payments, place a test order if your chosen gateway provides a test or sandbox mode. Check whether the checkout page, payment process, order confirmation, and email notifications are working correctly.
A smooth checkout is an important part of How to Create an Online Store with WordPress because customers may leave if the payment process is confusing or doesn’t work properly.
🔐 Keep Payments Secure
Always use SSL on your website and keep WordPress, WooCommerce, themes, and plugins updated.
Also, avoid installing payment plugins from unknown sources. Use official or trusted plugin providers.
Once your payment system is working correctly, you’re ready for the next part of How to Create an Online Store with WordPress—setting up shipping and delivery options for your customers.
10.How to Set Up Shipping
If you’re selling physical products, shipping is an important part of How to Create an Online Store with WordPress. Your customers should clearly know where you deliver, how much shipping costs, and how long their order may take.
1. Open Shipping Settings
From your WordPress dashboard, go to:
WooCommerce → Settings → Shipping
Here you can create shipping zones and decide which shipping methods customers can use.
2. Create Shipping Zones
A shipping zone is an area where you deliver your products.
For example, if you sell only in India, you can create a zone for India. If you deliver to specific states or regions, you can create more detailed zones.
3. Add a Shipping Method
WooCommerce lets you configure different shipping methods depending on your requirements.
You can offer:
- Free shipping
- Flat-rate shipping
- Local pickup
Choose the method that works best for your business.
4. Set Your Shipping Cost
If you’re charging customers for delivery, decide how much you want to charge.
For example, you could offer a flat ₹50 shipping fee or provide free shipping above a certain order value.
Make sure the shipping cost is clearly displayed before the customer completes the order.
5. Add Your Delivery Information
Create a simple shipping policy so your customers know when their order will arrive and what shipping rules apply to their purchase.
It’s also a good idea to create a simple shipping policy.
Mention details such as:
- Where you deliver
- Estimated delivery time
- Shipping charges
- Order processing time
- What happens if an order is delayed
Clear information can help customers feel more confident when buying from your store.
6. Test Your Shipping Settings
Before launching your store, place a test order and check whether the correct shipping option and price appear at checkout.
When learning How to Create an Online Store with WordPress, testing your shipping settings is just as important as testing payments.
Once shipping is ready, your store will be much closer to being ready for real customers.
11.How to Customize Your Store Design
A clean and simple design can make your online store easier to use. When learning How to Create an Online Store with WordPress, you don’t need a complicated design. Focus on making the store easy to browse and easy to buy from.
1. Choose a WooCommerce-Friendly Theme
Choose a lightweight WordPress theme that works well with WooCommerce.
Your theme should look good on both desktop and mobile devices. I recommend using the Astra theme because it is lightweight, beginner-friendly, and available with a free version. It also works well with WooCommerce, making it a good choice when you’re learning How to Create an Online Store with WordPress.
Astra gives you a clean and flexible design without adding unnecessary complexity. You can start with the free version and upgrade later if you need more advanced features.
2. Add Your Brand Style
Add your store logo, brand name, and preferred fonts. Keep the design consistent across your homepage, product pages, and checkout.
Avoid using too many colors or different font styles.
3. Design Your Homepage
Your homepage should quickly tell visitors what you sell.
You can include:
- A clear headline
- Featured products
- Product categories
- Special offers
- Customer reviews
- A clear call-to-action button
Don’t overcrowd the page. A simple layout often works better.
4. Improve Your Product Pages
Product pages are one of the most important parts of How to Create an Online Store with WordPress.
Use clear product images, simple descriptions, visible pricing, and an easy-to-find Add to Cart button.
If you’re selling physical products, show important details such as size, color, material, and availability.
5. Make Your Store Mobile-Friendly
Always check your website on a smartphone.
Make sure the menu, product images, buttons, cart, and checkout are easy to use on a smaller screen.
6. Keep the Design Simple
You don’t need expensive design tools to create a professional-looking store.
A clean layout, readable text, good product images, and simple navigation can make your store look trustworthy.
If you’re following How to Create an Online Store with WordPress, remember that the goal isn’t just to make the website look beautiful. It should also make it easy for visitors to find products and complete their purchases.
Once your design is ready, the next step is adding the essential plugins your store actually needs.
6. Keep the Design Simple
You don’t need expensive design tools to create a professional-looking store.
A clean layout, readable text, good product images, and simple navigation can make your store look trustworthy.
If you’re following How to Create an Online Store with WordPress, remember that the goal isn’t just to make the website look beautiful. It should also make it easy for visitors to find products and complete their purchases.
Once your design is ready, the next step is adding the essential plugins your store actually needs.
12.Essential Plugins for a WordPress Online Store
When you’re learning How to Create an Online Store with WordPress, you don’t need to install dozens of plugins. Too many plugins can make your website harder to manage and may affect performance.
Start with the plugins that solve an actual problem for your store.
1. WooCommerce
WooCommerce is the main plugin you’ll need for your online store. It adds products, shopping carts, checkout, orders, payments, and other essential eCommerce features.

2.Elementor Page Builder
Elementor is a popular page builder plugin that can help you design your WordPress store without writing code. It uses a drag-and-drop editor, so beginners can create and customize pages more easily.
Elementor has a free version that includes many useful design features for creating basic pages, sections, buttons, images, and layouts.
There is also a paid version, Elementor Pro, which provides more advanced features such as additional widgets, professional templates, advanced design options, and more control over your website.
For a new online store, I recommend starting with the free version. You can always upgrade to Elementor Pro later if your store needs more advanced design features.
One of the biggest advantages of Elementor is that you can visually edit your pages and see the changes while you’re building them. This makes it easier to create a professional-looking store without needing coding skills.
When learning How to Create an Online Store with WordPress, Elementor can be especially useful for customizing your homepage, landing pages, promotional sections, and other important pages.
3. SEO Plugin
An SEO plugin can help you manage titles, meta descriptions, sitemaps, and other basic SEO settings.
Since you’re already using Rank Math, you can continue using it instead of installing another SEO plugin.
4. Cache & Performance Plugin
A caching plugin can help improve your website’s loading performance.
If your hosting supports LiteSpeed, LiteSpeed Cache can be a useful option for caching and performance optimization.
5. Security Plugin
A security plugin can provide additional protection for your WordPress website. Choose a trusted plugin and keep it updated.
You don’t necessarily need multiple security plugins. One properly configured solution is usually enough.
6. Backup Plugin
Regular backups are important for an online store because you’ll be dealing with products, orders, customer information, and other website data.
Choose a reliable backup solution and make sure your backups can actually be restored.
7. Payment Gateway Plugin
You’ll need a payment gateway plugin if your chosen payment provider requires one.
Before installing it, check whether the gateway supports your country, currency, and preferred payment methods.
8. Contact Form Plugin
A simple contact form gives customers an easy way to ask questions about products, orders, returns, or other issues.
Don’t Install Plugins Just Because They’re Popular
One important tip when learning How to Create an Online Store with WordPress is to avoid installing plugins you don’t really need.
Before adding a plugin, check its reviews, update history, compatibility, and developer information.
Also, keep your plugins updated and remove plugins that you no longer use.
A smaller set of reliable plugins can make your store easier to maintain and keep your website running smoothly.
Once your essential plugins are ready, the next step in How to Create an Online Store with WordPress is making sure your store is secure.
13.How to Secure Your Online Store
Security is an important part of How to Create an Online Store with WordPress. Your store may handle customer accounts, orders, and payment-related information, so you should take basic security seriously from the beginning.
1. Use an SSL Certificate
Make sure your website uses HTTPS instead of HTTP. SSL helps encrypt the connection between your website and its visitors.
Most reputable hosting plans, including eligible Hostinger plans, provide SSL. Check that it is enabled before launching your store.
2. Keep WordPress Updated
Always keep WordPress, WooCommerce, your theme, and plugins updated.
Updates often include security fixes, so don’t ignore available updates.
3. Use Strong Passwords
Create a strong and unique password for your WordPress administrator account.
Avoid simple passwords that are easy to guess, and don’t share your admin login details with anyone unnecessarily.
4. Use Trusted Plugins and Themes
Only install plugins and themes from reliable sources.
Avoid downloading nulled or pirated WordPress plugins and themes. They can contain malicious code and put your entire store at risk.
5. Take Regular Backups
Regular backups are extremely useful if something goes wrong with your website.
Keep recent backups of your website and database, and make sure you know how to restore them when needed.
6. Protect Your Admin Account
If possible, use two-factor authentication for your WordPress administrator account.
This adds another layer of protection even if someone manages to obtain your password.
7. Choose Reliable Hosting
Your hosting provider also plays an important role in website security. When learning How to Create an Online Store with WordPress, don’t choose hosting based only on price.
Hostinger provides security-related features on its hosting plans, but always check the features included with your specific plan before purchasing.
8. Check Your Store Regularly
Don’t wait until something goes wrong. Check your website regularly, update your software, review your admin users, and make sure backups are working.
These simple steps can make How to Create an Online Store with WordPress much safer and easier to manage.
Once your security basics are ready, the next thing to consider is the cost of running your online store.
14.How Much Does It Cost to Create an Online Store?
Before starting How to Create an Online Store with WordPress, it’s important to understand the basic costs involved. The good thing is that you don’t need a huge budget to start a small online store.
1. Domain Name
Your domain is the address of your store, such as yourstore.com. Try to choose a short, simple name that’s easy for customers to remember.
If you choose an eligible Hostinger Premium plan, you may get a free domain for the first year. This can help you save money when starting your online store because you won’t need to purchase the domain separately.
You can also read my How to Get a Free Domain for 1 Year with Hostinger guide to understand how the offer works.
For a beginner, I personally feel Hostinger is a strong choice for starting an eCommerce website with WordPress. It keeps the setup simple, provides useful hosting features, and can help you get your store online without making the process complicated.
👉 Start Your Online Store with Hostinger
My honest advice: If you’re just starting your first WordPress store and want an easy setup without spending unnecessarily on separate services, Hostinger is one of the options I would seriously consider. Just make sure you check the current plan features, free-domain eligibility, and renewal price before purchasing.
2. WordPress Hosting
Hosting is the place where your website’s files, images, products, and other data are stored. In simple words, without hosting, your online store cannot run properly on the internet.
If you’re starting an online store with WordPress, I recommend choosing beginner-friendly hosting. In my experience, Hostinger is a good option because the setup is simple and easy for beginners to manage.
Depending on the plan, Hostinger can offer features such as SSL, WordPress tools, storage, backups, and performance features. So, when choosing a hosting plan, don’t look only at the price. Also check the features, resources, and renewal price.
You can start your store with a suitable plan and upgrade your hosting later as your visitors and orders grow.
My personal recommendation: If you’re creating your first WordPress online store and want a simple setup, Hostinger is definitely worth considering. Before purchasing, check the current plan features and pricing to make sure they fit your store’s needs.
3. WooCommerce
WooCommerce itself is available as a free WordPress plugin.
However, you may choose paid extensions later for additional features such as advanced payments, subscriptions, shipping, or marketing tools.
4. WordPress Theme
You can start with a free WooCommerce-compatible theme, and Astra is a great option for beginners. It is lightweight, fast, easy to customize, and works well with WooCommerce.
Astra also has a free version with useful design features, so you don’t need to buy a premium theme when you’re just starting your online store. If you need more advanced customization later, you can upgrade to Astra Pro.
For a new WordPress store, I recommend starting with the free Astra theme and upgrading only when you actually need additional features.
5. Payment & Other Costs
Depending on your payment provider, you may have transaction or processing fees.
You may also spend money on premium plugins, email services, marketing, product photography, or other business tools as your store grows.
A Simple Starting Budget
For someone learning How to Create an Online Store with WordPress, the initial cost can be relatively low if you use WordPress, WooCommerce, a free theme, and a suitable hosting plan.
You can start with the essentials and only pay for additional tools when your store actually needs them.
The most important thing is to check the current pricing, renewal rates, and included features before purchasing any hosting plan because prices and offers can change.
Once you understand the costs involved in How to Create an Online Store with WordPress.
15.Common Mistakes Beginners Should Avoid
When you’re learning How to Create an Online Store with WordPress, it’s easy to make a few mistakes in the beginning. Most of them are simple to avoid if you plan your store properly.
1. Choosing Hosting Only by Price
Don’t choose hosting just because it has the lowest price.
Check the performance, security, support, storage, and renewal price before making your decision.
If you’re using Hostinger, compare the current plans and choose one that fits your store instead of automatically choosing the most expensive option.
2. Installing Too Many Plugins
You don’t need a plugin for every small feature.
Too many unnecessary plugins can make your website harder to manage and may affect performance.
Install only trusted plugins that your store actually needs.
3. Using Poor Product Images
Product images are one of the first things customers notice.
Avoid blurry or low-quality images. Use clear photos and show your products from useful angles.
4. Writing Very Short Product Descriptions
Don’t simply write one or two lines about a product.
Explain the important features, size, material, benefits, and other details customers may want to know before buying.
5. Ignoring Mobile Users
Many people shop using their phones.
Always check your store on mobile and make sure the menu, product pages, cart, and checkout work properly.
6. Making Checkout Complicated
A complicated checkout can make customers leave without completing their purchase.
Keep the checkout process simple and ask only for information you actually need.
7. Forgetting Shipping and Return Information
Customers want to know when their order will arrive and what happens if they want to return it.
Clearly display your shipping, return, refund, and delivery information.
8. Not Testing the Store
Before launching, test the complete buying process yourself.
Check the product page, cart, checkout, payment method, shipping charges, order confirmation, and emails.
This is an important part of How to Create an Online Store with WordPress because small errors can create a poor customer experience.
9. Ignoring Website Security
Keep WordPress, WooCommerce, themes, and plugins updated.
Use SSL, strong passwords, regular backups, and trusted plugins to protect your store.
10. Trying to Do Everything at Once
You don’t need a perfect store on day one.
Start with your essential products and features, then improve the website based on customer feedback and your business needs.
The goal of How to Create an Online Store with WordPress isn’t to build the biggest store immediately. It’s to create a reliable, easy-to-use store that you can improve over time.
16.Tips to Grow Your Online Store
Once you understand How to Create an Online Store with WordPress, the next step is getting people to visit your store and turning those visitors into customers.
You don’t need to try every marketing strategy at once. Start with a few simple methods and see what works for your business.
1. Focus on Product SEO
Use clear product names, helpful descriptions, and relevant keywords on your product pages.
This can help search engines understand what you’re selling and bring more relevant visitors to your store.
2. Use High-Quality Product Images
Good images can make a big difference in online shopping.
Show your products clearly and, when possible, include multiple images from different angles.
3. Make Your Website Fast
A slow store can frustrate visitors and may cause them to leave before completing a purchase.
Use a reliable hosting provider, optimize your images, remove unnecessary plugins, and use caching where appropriate.
4. Make Your Store Mobile-Friendly
Check your store regularly on smartphones and tablets.
Your product pages, buttons, menus, cart, and checkout should all be easy to use on smaller screens.
5. Build Trust
Add customer reviews, clear product information, contact details, and straightforward return and refund policies.
People are more likely to buy when they feel comfortable with the store.
6. Promote Your Products
You can promote your products through social media, email marketing, content marketing, or paid advertising.
Start with the channels where your potential customers are most active instead of trying everything at once.
7. Create Useful Content
A blog can bring additional visitors to your store.
You can write tutorials, product guides, comparisons, buying guides, and answers to common customer questions.
This is one of the reasons How to Create an Online Store with WordPress is more than just a technical setup. Your website also needs useful content that helps people discover your products.
8. Track Your Results
Keep an eye on important numbers such as visitors, product views, add-to-cart actions, and completed orders.
This will help you understand what’s working and where your store needs improvement.
9. Keep Improving Your Store
Don’t expect everything to work perfectly from day one.
Test different product images, descriptions, offers, and page layouts. Small improvements can make a noticeable difference over time.
If you’re still working through How to Create an Online Store with WordPress, focus on getting the basics right first. Once your store is working smoothly, you can gradually add more marketing and growth strategies.
17.Frequently Asked Questions (FAQs)
If you are still wondering how to create an online store with WordPress, these common questions can help you understand the process a bit better.
1. Can I create an online store with WordPress?
Yes. You can build a complete online store by combining WordPress and WooCommerce. You can add products, manage orders, accept payments, and set up shipping.
2. Is WordPress good for e-commerce websites?
Yes. WordPress with WooCommerce is a great, flexible option for beginners and small businesses. You can start with basic features and add more as your store grows.
3. Do I need coding knowledge to build a WordPress store?
No. You can complete most of the basic setup without coding. WordPress and WooCommerce provide settings and tools that allow even beginners to build and manage a store.
4. Is Hostinger good for WordPress online stores?
Hostinger is a good choice for new or small WordPress stores. It offers WordPress hosting with features like SSL and easy-to-use management tools for beginners.
5. Is WooCommerce free?
Yes. The core WooCommerce plugin is free to install and use. However, certain extensions, payment services, themes, and other tools may come with a cost.
6. How much does it cost to build an online store?
The cost depends on your hosting, domain, theme, plugins, payment provider, and other business needs.
You can start small with WordPress, WooCommerce, a suitable hosting plan, and a free theme, and then invest more as your store grows.
7. Can I sell digital products with WordPress?
Yes. WooCommerce can be configured to sell digital and downloadable products alongside physical products.
8. Can I create a mobile-friendly online store?
Yes. Choose a responsive theme and check your product pages, cart, and checkout process across various screen sizes.
A mobile-friendly design is particularly important because many customers browse and shop using their smartphones.
9. How long does it take to build a WordPress online store?
A basic store can be set up quickly, but the total time depends on factors such as the number of products, payment methods, shipping options, design customizations, and other specific requirements.
10. What should I do after building the store?
Once you have finished building your online store with WordPress, test the entire buying process before launching it.
Check your products, checkout, payment, shipping, emails, mobile design, security, and essential store policies.
After that, start promoting your products and continue improving the store based on feedback from visitors and customers.
18.Final Verdict
If you’re planning How to Create an Online Store with WordPress, you don’t need to make the process complicated. WordPress and WooCommerce give you the basic tools needed to start selling online.
For hosting, I recommend Hostinger for beginners because the setup is simple, the dashboard is easy to manage, and it offers useful features for a new WordPress website.
You can start with a few products and add more features as your store grows. There’s no need to spend a lot of money on premium themes or plugins from the beginning.
The most important thing is to create a store that is fast, secure, mobile-friendly, and easy to use.
I hope this guide helped you understand How to Create an Online Store with WordPress and gave you a clear path to start your own store.
If you’re just getting started, take it one step at a time. Set up your hosting, install WordPress and WooCommerce, add your products, configure payments and shipping, and test everything before launching.
🚀 Ready to Start?
If you’re ready to build your store, you can check Hostinger’s current hosting plans and choose the one that fits your needs.
👉 Get Hostinger for Your WordPress Store
One final tip: Don’t wait for your store to be perfect before launching. Start with the essentials, learn from your customers, and improve your website as you grow.